

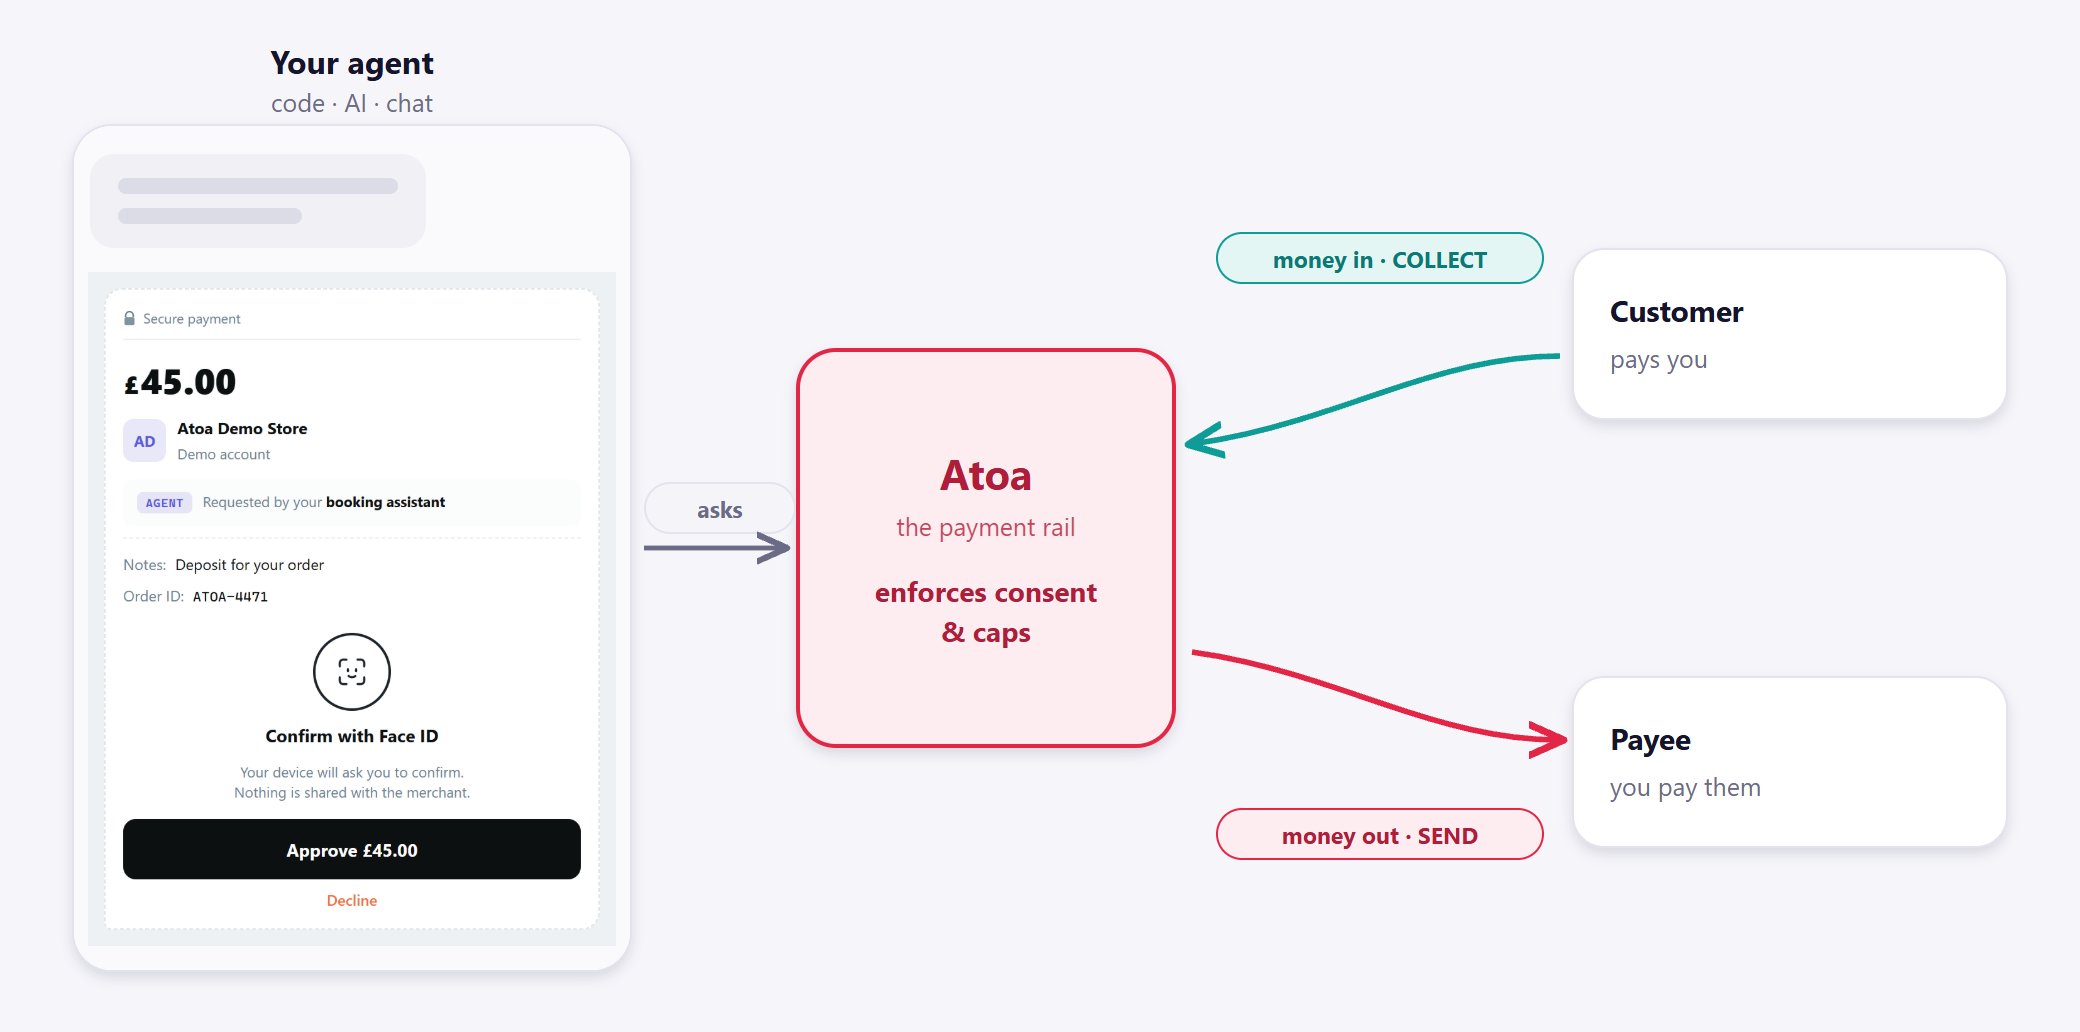
Your agent asks; the customer approves in your own UI; Atoa enforces the caps on every payment after that.
How it works
Two calls. Your server creates a payment and sends itsnextAction to the browser; your browser shows it.
nextAction your agent can read.
Contracts and limits
A contract is a human’s standing approval. They set it up once — a cap per payment, a cap per period, an expiry date, and a direction — and after that your agent can move money inside it without asking again. Atoa checks every charge against the contract on its own servers. A payment over the cap is refused there, not in your code. Two things still need a person: setting the contract up, and Strong Customer Authentication (SCA) on payouts and off-session charges, where the approver enters a one-time code or uses a passkey on Atoa’s page.

Collect or send


- Customer present →
payment.collectreturns a pay-link/QR. No contract. → Collect - Customer not present →
payment.collectwith acontractId, under a COLLECT contract the customer approved once. → Collect - Paying out →
payment.sendunder a SEND contract the account owner approved once. → Send
Get started
Get a sandbox API key from the Atoa dashboard and set it in your environment. Sandbox and production keys are separate.Collect your first payment
Create a payment on your server, then show it. In sandbox, choose the Atoa Test Bank in the checkout and pick the outcome yourself.req.next_action from your
server to the browser and mount it:
Browser
Send your first payout
Create a SEND contract, approve it once at theauthorizationUrl, then send. Every payout pauses for the
business owner’s approval before money moves. In sandbox the recipient account decides the outcome — list the
accounts with atoa.sandboxTestAccounts().
Next steps
Embedded checkout
Render the payment inside your own product.
Collect — money in
Pay-links, off-session charges, SCA, refunds.
Send — money out
Payouts, SCA, batches, contract limits.
AI agents & tools
Hand the SDK to your model as tools.
Reference
Auth, methods, types, errors, sandbox, go-live.
Download the notebook · run it locally
The full flow as a runnable Jupyter notebook —
pip install atoa-agent-pay, add a sandbox ATOA_API_KEY, run.